Below are the steps to setup Sandbox in VS Code:
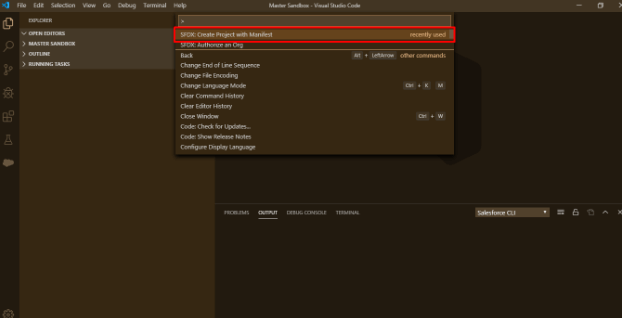
- Create a Project in VS Code: Open command palette using Ctrl+Shift+p keys and then select “sfdx: create a project with Manifest” (as shown in below image) and click enter. Write the Project name and select a folder to which you want to store this project.
- Authorize an Org: Select “Authorize an Org” command and then select “Sandbox”, it will redirect to the login page of Salesforce(test.salesforce.com) and then login with Sandbox Org’s credentials.
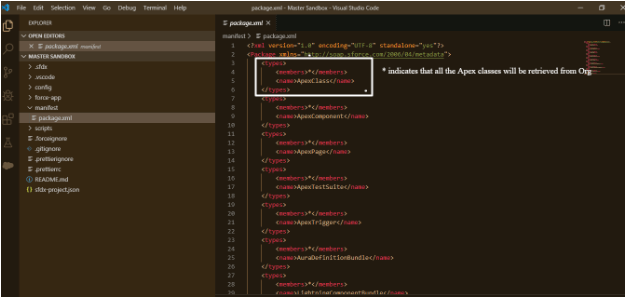
- Fetch metadata from Sandbox Org to SFDX Project: When you select the “sfdx: create project with Manifest” command while creating the new Project, it creates the Package.xml file under the manifest folder and this file includes those components which you want to retrieve from Sandbox Org (as shown in the screenshot below).
You can fetch the metadata by using one of the following approaches:
- Right-click on package.xml file and click on “Retrieve source in the manifest from Org Source”.
- Write the following command in the terminal in order to fetch metadata:
sfdx force:source:retrieve --manifestThe highlighted text in the command indicates the complete absolute path of the package.xml file as an example which could be
d:\TestSandbox\manifest\package.xml


Leave A Comment