We can migrate S3 buckets from one to another AWS account with the following steps.
Prerequisite:
- Destination AWS Account Number.
- Need to attach Bucket Policy with source bucket.
- IAM user Policy
- Create the S3 bucket in the destination AWS account.
In order to copy buckets and their objects to another AWS account, we require three above things.
So, How can we check the destination AWS account number?
Step 1: Log in to the destination AWS account, now Goto “My Billing Dashboard” and find out the destination account. If you don’t have “My Billing Dashboard” access then goto to “Identity and Access Management” (IAM) and find out the destination Account Number, Check below:

Now you have your destination 12 digit account number with the help of this we’ll copy the S3 bucket’s object to another AWS account. Here I’m taking a demo account number like: 123123123123
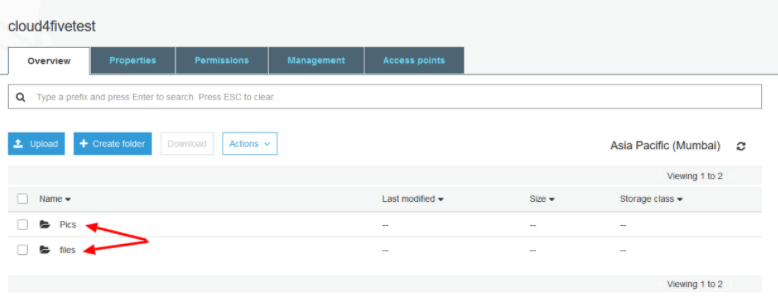
Example Bucket name: cloud4five
Example Bucket’s Objects: Pics and files.
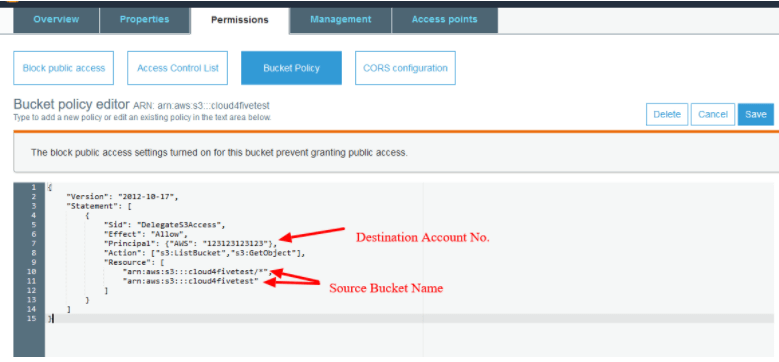
Step2: Now, We’ll attach the policy with “cloud4five” bucket, for this go to the “permissions” tab of “cloud4five” and attach the following policy:
{

"Version": "2012-10-17",

"Statement": [

{

"Sid": "DelegateS3Access",

"Effect": "Allow",

"Principal": {"AWS": "123123123123"},

"Action": ["s3:ListBucket","s3:GetObject"],

"Resource": [

"arn:aws:s3:::cloud4fivetest/*",

"arn:aws:s3:::cloud4fivetest"

]
}

]
}
Check the screenshot below:
Step3: Now you need to login to your destination AWS account, Goto IAM Management Console, and create a new user policy. I have created the policy with the name “s3-Syc-buckets” you can create with a different one. Now attach the policy with your IAM user. Also, create the destination bucket where we need to migrate the objects of the source bucket. I have created the destination bucket with the name “gettingfromcloud4five”. You can pick different names.
policy Name: s3-Syc-buckets
{

"Version": "2012-10-17",

"Statement": [

{

"Effect": "Allow",

"Action": [

"s3:ListBucket",

"s3:GetObject"

],

"Resource": [

"arn:aws:s3:::cloud4fivetest",

"arn:aws:s3:::cloud4fivetest/*"

]
},

{

"Effect": "Allow",

"Action": [

"s3:ListBucket",

"s3:PutObject",

"s3:PutObjectAcl"

],

"Resource": [

"arn:aws:s3:::gettingfromcloud4five",

"arn:aws:s3:::gettingfromcloud4five/*"

]
}

]
}
On the final step, ssh to any Linux machine and configure the AWS CLI. I have mentioned the steps below:
Configuring the AWS CLI
ubuntu@ip-171-30-1-12:~$ aws configure
AWS Access Key ID [None]: AYUA2DXCVBNRZ6V8FEIM
AWS Secret Access Key [None]: dfkjHoURC1/Pi8o4zUGFTDSwzQ10eYUDVfZPOIUY
Default region name [None]: ap-south-1
Default output format [None]: json
Now we have configured the AWS CLI on your machine. Now you need to run the following command
aws s3 sync s3://SOURCE-BUCKET-NAME s3://DESTINATION-BUCKET-NAME –source-region SOURCE-REGION-NAME –region DESTINATION-REGION-NAME
ubuntu@ip-171-30-1-12:~$ aws s3 sync s3://cloud4fivetest s3://gettingfromcloud4 five –source-region ap-south-1 –region ap-south-1


Leave A Comment